Brdy for Home

Fast, Stable, Reliable

No digging. Easy to set up.
Fast, dependable broadband.

Price Match Guarantee

Find a better price elsewhere?
We’ll beat it!

Activation Guide

VIASAT TechTools V2 
Quick Guide 

Start by downloading and Installing the Viasat TechTools V2 application from the Apple App Store or from Google Play. Once installed you will need to open the app and select the region that applies to you.  

Once this has been selected, you will need to sign in using your credentials. If you do not have an account then you can click the sign up link to create a new account.

Fill in the required information and click sign up. 

You will need to verify the account by selecting the preferred method shown below.

Once the account has been created and verified, you will be brought to the terms and conditions section, you will be required to click the link which will open the terms & conditions page.

From there, you will need to read and scroll down to the bottom of the page to acknowledge you have read the T&C’s, once this is completed you will then be able to tick the box confirming that you accept the terms and condition, now you will be able to proceed to the next page.

Now that this process has been completed, you should now have access to the Quick access features and can begin installing your dish equipment. In order to determine the line of sight you will need to select the Satellite Finder option. This will allow you to use your phone to locate the general area of the satelllite.

Select your required satellite, (the KA-Sat satellite is the recommended choice). The arrow needs to be pointing ‘upward’ to find the general direction of where the satellite is roughly located.

The Satellite Finder option will also provide you with the Elevation (EL) and Azimuth (AZ) results as well as Skew (if required)

You can also utilize the Map & Coordinates option to recalculate your position

Once the general location of the satellite has been found, you can now open the Pointing & Peaking option to align the dish.

The application will attempt to identify that the modem is connected to initiate the installation process.

Modem disconnected – Check your WiFi or equipment connection and retry. You will need to check the connections and make sure you are connected to the modems WiFi network.

Once the modem has successfully connected, you will receive a tick on the (Out Door Unit) ODU link check, this will confirm that the etria has been identified. Click continue for the Pointing & Peaking menu.

The Dish is now ready to be aligned and the etria will automatically start beeping, this will confirm that the tria is searching for the satellite signal. The application will provide the azimuth, elevation, and skew details for more accurate pointing

The etria (dish receiver) will ‘beep’ in 2 second intervals. This will continue until you have locked on to the signal carrier.

When aligning the dish, start by checking the elevation results and adjust the dish bracket accordingly.

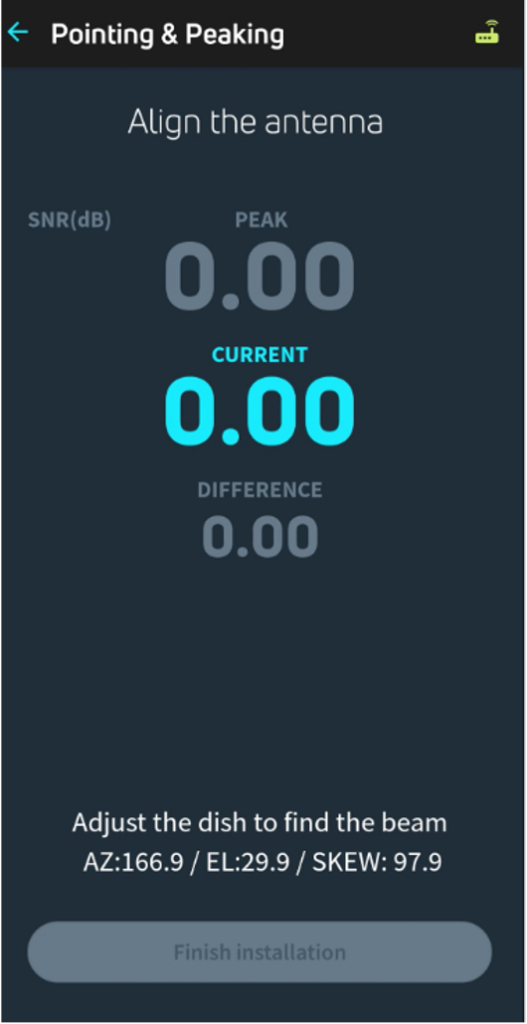
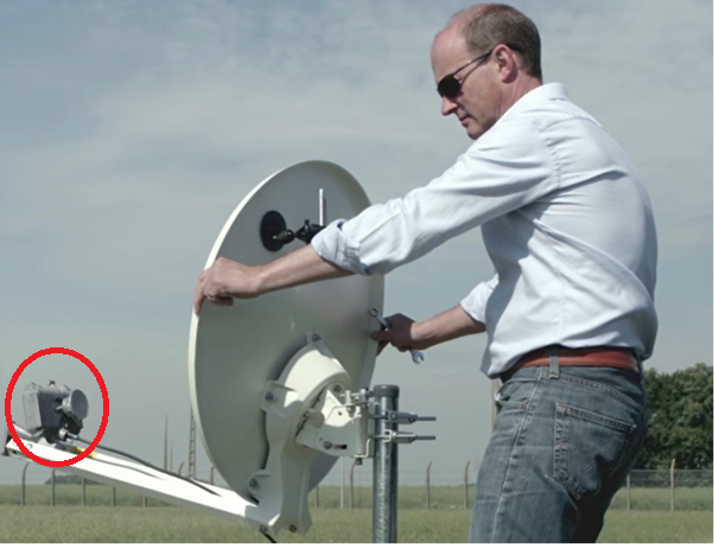
Once the elevation is set, proceed with moving the dish in the direction towards the azimuth results until you notice the ‘beeps’ become faster and higher pitched, keep moving in this direction until you reach a solid tone, this will indicate that you have locked on to the satellite.

Check the dish signal strength to confirm you have a signal of 10dB or higher, once this is confirmed tighten the bolts to make the dish secure.

Click Finish Installation to finish the alignment process.

You may be required to enter your unique activation key. This information should have been supplied to you prior, however, if this has not been supplied, please contact our customer services team and we will be glad to provide this for you.

If a software update is required, the app will complete this automatically for you.

Once completed the modem will perform the Quality of Installation (QOI) checks.

Now click Finish on the app, the modem will proceed with the connection and will complete the network entry process to the satellite. This may take a few minutes to complete.

When this is complete you will get the online status with all 4 green Icons indicating that you should now be able to access the internet in full.

Request a callback